Wednesday, February 29, 2012

the best way to trim asparagus [what-mom-taught-me wednesday]


rare is the occasion when i cook something without thinking of my mother in one way or another.

with every movement through the kitchen, every stir of the spoon, i hear her voice, telling me what she is doing and why, as a much younger me watches or helps her cook for her husband, eight children, and whatever friends and family might be in the house at that moment.

so.. each week i will try to highlight a lesson whose source i otherwise may have forgotten... things i am grateful my mother taught me about cooking.

what-mom-taught-me wednesday #3: how to trim asparagus - quick, easy, and o-so-satisfying!

you have a bunch or two of asparagus in front of you.

the bottoms are white, tough, and dry... so you need to trim them. 

you could take a knife to the whole pile and slice an inch or two inches or three inches off the bottom... but then you end up taking too much off of some (no, come back, precious green deliciousness!!) and leaving others with tough, woody stalks that your guests now have to either attempt to swallow and choke on or delicately place into their napkins when you aren't looking.

so... that method? no good.

you could take a knife to each individual stalk and cut off the bottom where it starts to look pale and thick and tough, but let's face it- one of the reasons you bought this asparagus is because it cooks up quickly and you just don't have all day! 

my mom saw me doing it this way once, slicing off the bottoms of each individual stalk, and showed me the right path... ready?

simply grasp the tough bottom of the stalk with one hand, and firmly grip the tender green stalk about midway up with your other hand, and bend... snap! the asparagus will break at the exact right spot, right where tough and tender meet.


you will quickly gain a rhythm with this method, and find it both quick, and satisfying, to snap away all that tough no-goodness. the task will be done in no time!

stay tuned (or join this site with the button on the right) to see what i made with this asparagus.. so good!


Tuesday, February 28, 2012

ribena and gerolsteiner sparkling mineral water

in our house, we love seltzer. we recently discovered the gerolsteiner sparkling mineral water at trader joes costs about as much as poland spring seltzer at stop and shop... and gerolsteiner is european, and the bottle is very pretty, so if you like mineral water, it's totally worth the splurge.

we also like to keep a little ribena in the house. it, too, is european (british though, not german) and has been made for over 70 years! i like to add a splash of it to water and seltzer. my husband likes to add the whole recommended two tablespoons... :)
source: http://blog.ribena.co.uk
so, for our splendid valentine's brunch, we served a little pitcher of ribena alongside a bottle of gerolsteiner sparkling mineral water for a refreshing, fruity, morning pick me up.

recipe?

  • pour one glass of seltzer
  • add somehwere between a splash and two tablespoons of ribena
  • stir gently to combine
  • enjoy!

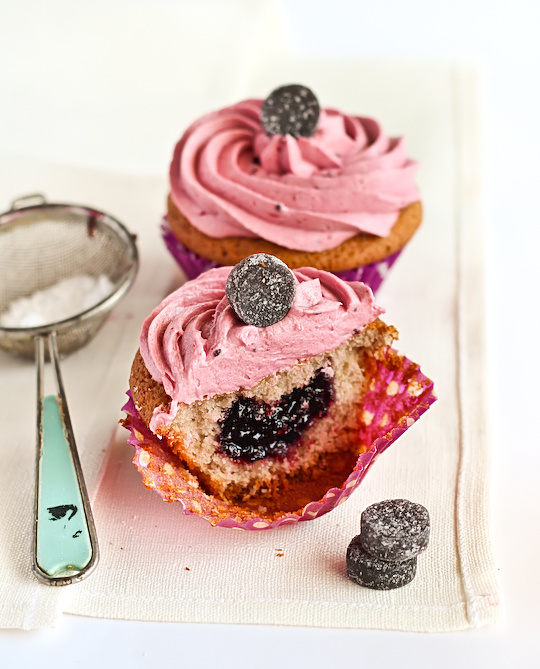
check out these ribena cupcakes!!
source: raspberricupcakes.com

this fruity drink was served with our splendid 
valentines day brunch menu
sparkling mineral water with blackcurrant ribena (you are here)

Saturday, February 25, 2012

oven fried bacon... the easiest way to cook bacon with the best results


really, it's not even worth using any other method. if you like crispy, evenly cooked bacon that requires, hmm, like, no time or attention or scrubbing of pans... oven fried bacon is your man.

but if you like standing over a hot skillet that is spitting hot grease on you and your whole stove and waiting and watching and trying to get your bacons to lie down flat while some parts burn and other parts remain fatty and squishy and unchewable, then, ok, you can make it that way, i did for years until i came across this article in cooks illustrated. and if you keep making it that way, in a pan on the stove or on a griddle, for a long time, you will probably get really good at it and it will be as good as my oven fried bacon method and i will have to bow to your skills. but you still have to scrub a pan (or a griddle. sad face.).

ready to bake some bacon?

STEP ONE
preheat oven to 400 degrees (you can cook the bacon at 375 if you have something else in the oven at the same time that needs to be at that lower temperature, like i did when i made the orange sugar dutch baby, it will just take a bit longer)

STEP TWO
put a cooling rack in a baking sheet (make sure you use the kind with edges)
i wouldn't recommend these oneida baking pans. they are the worst, they warp and pop in the oven and have ruined many a cookie, but someday i will have some really great commercial jelly roll pans like these

STEP THREE
lay your bacon out as evenly and flattaly as possible
this is thick cut bacon from Saugatuck Craft Butchery in Westport, CT. more on that later.

thick cut goodness.

STEP FOUR
bake bacon. rotate pan about halfway through cooking time. depending on how much bacon you are cooking and the thickness of the slices, it should take about 10 to 15 minutes to be finished. you want it nicely browned and glowing with grease. it won't be 'crisp' until it has cooled, so you are going on looks here. (tip, if bacon is cooking unevenly, you may wish to rearrange the slices using a pair of tongs during cooking)
bacon in oven. i got to sneak a peek at my dutch baby.
not ready just yet. see how the fatty bits are still too soft looking?
now it's ready! they just glow!

STEP FIVE
using tongs, transfer the bacon to a plate that has brown paper, paper towels, or even the wax paper used to wrap your bacon (folded inside out) to drain excess grease.

STEP THE-LAST
serve and devour.. 


this bacon was served with our splendid 
valentines day brunch menu
oven fried bacon (you are here)


Friday, February 24, 2012

orange sugar dutch baby - a giant oven pancake

orange sugar dutch baby.... those words just make me feel happy.


the keystone of hubs' and my splendid valentine's brunch, this giant zesty pancake was an absolute treat. i was originally inspired to make a dutch baby by this post on posy gets cozy. i liked the citrus tones of the recipe she linked, but i chose this recipe as my foundation, instead, because i trust alton brown with my (culinary) life and the cooking temperature would allow me to make oven-fried bacon at the same time (instructions for that coming soon!).

but, i did want to keep the lively citrus notes (although i had oranges on hand, not lemons), and i did not have vanilla sugar, so i had to make a few changes to the recipe... and hubs and i were really pleased with the results!


ingredients

dutch baby

  • 2 tablespoons butter, cold is fine
  • 1 tablespoon butter, melted and cooled
  • 2 3/8 ounces unbleached white flour (about 1/2 a cup, but i really recommend weighing your flour whenever possible)
  • 1 teaspoon kosher salt
  • 3 tablespoons sugar
  • 1/2 c milk, room temperature
  • 2 large eggs, room temperature
  • 1 teaspoon (good quality) vanilla extract
  • half the zest from one orange (check out my post on how to zest an orange if you need help)


toppings

  • the other half the zest from one orange
  • couple drops vanilla extract
  • 5 tablespoons sugar
  • orange fruit, sliced thickly, then quartered


serves (let's be honest here...) two richly, four modestly

preparation
preheat oven to 375 degrees F
drop two tablespoons of butter in 10 inch cast iron skillet, and place the skillet in the oven. you want it to be super hot by the time you add the ingredients, so let it warm with the oven while it preheats and then stay in there for another ten minutes after the oven is finished preheating. plan the preparation of your ingredients accordingly.

combine in a bowl: flour, salt, sugar.

combine in a bowl (or be like me and use a pyrex cup) milk, eggs, vanilla extract, and orange zest. whisk until smooth and egg is fully combined. if you don't have a little cute teeny tiny whisk like this you should get one.
(ohmygoodness this smells like a creamsicle) 

:::before you carry out the next step, be ready to take the very hot skillet out of the oven and add your ingredients.:::

pour dry ingredients into a food processor, followed by milk/eggs mixture, followed by butter. process for 30 seconds, until perfectly smooth.


remove skillet from oven (see all the good blackened browned butter bits floating in the hot grease? these are your flavorful friends)

ready for this part? it's so fun.
slowly/gently/carefully pour batter into center of skillet, letting the batter float on top of a cushion of browned butter. the butter will rise up the sides of the pan to keep it happily greased and non-stick-tastic

now gently place the skillet back into the oven. it should take at least 15 but up to 30 minutes to cook. it is ready when the edges are "puffed and brown" and the top is golden to your liking.

she nuh ready yet
while the dutch baby is in the oven (that sounds horrible!!) prep your toppings.
place the sugar in a little bowl, add the remaining orange zest, mix well. add a couple drops of vanilla extract, and mix well.

now slice the orange that you zested (waste not/want breakfast not) into thick slices and quarter them. or slice them however you like to make them good for squeezing over giant oven pancake slices. my husband tried to explain the right way to slice an orange for this purpose but i didn't quite follow so next time this part will be his job.

when the dutch baby is ready, remove it from the oven.


while it is still hot, sprinkle some of your orange-sugar over it (but leave enough for guests to add more to their own slices). now squeeze some orange sections over it, aiming for the particularly well browned sections and letting it roll down to make lovely little pools of orange syrup in the valleys.


serve as hot as possible, with the orange slices and orange sugar alongside. make sure you give the orange sugar another good stir before serving. you might also wish to serve it with a very cute little bunny spoon...


we quartered it and added more orange sugar and freshly squeezed orange juice once it was on our plates. maybe you're supposed to eat it with a fork and knife, but we quickly discovered you can eat the slices bent in half in your hands like a good new york pizza. so good!

i'd love to try this with grapefruit zest next... what other fruity flavors would you like to see in it?


this pancake was served with our splendid 
valentines day brunch menu
orange sugar dutch baby (you are here)

{this moment}


a friday ritual.
a single photo – capturing a moment from the week.
a moment i'd like to pause, to revisit and remember.

crocuses blooming outside... these will be put away soon.


{this moment} inspired by SouleMama
if you are inspired, too, leave a link to your 'moment' in the comments for all to see, and head over to SouleMama's blog to do the same. I have discovered so many great blogs this way! xoxo

Wednesday, February 22, 2012

how to zest an orange [what-mom-taught-me wednesday]


rare is the occasion when i cook something without thinking of my mother in one way or another.

with every movement through the kitchen, every stir of the spoon, i hear her voice, telling me what she is doing and why, as a much younger me watches or helps her cook for her husband, eight children, and whatever friends and family might be in the house at that moment.

so.. each week i will try to highlight a lesson whose source i otherwise might have forgotten... things i am grateful my mother taught me about cooking.

what-mom-taught-me wednesday #2: how to zest an orange (or a lemon or a lime or a grapefruit or a pomelo or...)


when you zest an orange, or other citrus fruit, use the right tools at the right angles to ensure you get the zest (the colored, oily part of the peel) and not the bitter white pith.


the zest of the orange is full of capsules of oily orange-scented citrusy goodness....

...also known as trichomes, round, concave, glandular epidermal cells specialized to secrete orange oil.
source: sciencephoto.com
to zest an orange, you drag a citrus zester across the skin to remove strips of the orange zest while avoiding the white pith.
this is the kind of citrus zester i used with my mom growing up...
it is handy for creating long beautiful curls of citrus zest (with practice!) to garnish drinks, cakes, and other citrusy delights, but it requires skill and patience to angle the zester just-so, to ensure you don't get loads of bitter white pith as well.

for major zesting operations (we're talking a teaspoon or more here, people), i highly recommend a microplane grater.
microplane ultimate citrus tool

the microplane citrus tool is great because the zesting blades are small enough and angled so that you can basically just rasp your citrus fruit to heck and not get any pith at all.
raspy raspy
just make sure that as soon you see the pale fibrous pith showing through the zest, you move on to the next area.

see the lighter colored spot on the right? i came pretty close to the pith there.
and there you go... lots of aromatic, flavorful zest, full of orange oil, without any bitter pith.
ta-da! zest!
now what will you make with it?

p.s. check out this awesome tip from thekitchn about maximizing the flavor of your zest!!

Tuesday, February 21, 2012

valentine's day (obsv.) - a splendid brunch

hubs and i couldn't celebrate valentine's day on valentine's day because of crazy work schedules last week, so we decided to observe celebrate it on the following saturday, instead. we planned a romantic brunch and home-made valentine exchange and called it "Valentine's Day (obsv.)"

we have been hand making valentines for each other since we were 17, and i hope that never changes. 

we usually go out to dinner (actually, when we were 17 it was a coffee at starbucks) but this year our valentine's budget was blown on an emergency car repair (although nothing says romance like new transfer case fluid) so we decided to keep it simple. and simple really is best. i truly am grateful that things happen to remind us of that, because it makes us happy, and it feels satisfying when we keep things simple, and i hope that never changes.

so, this year, on valentine's day (obsv.) i planned a simple, but spectacular, brunch:

i'll share the menu with you today, and elaborate over the rest of the week with recipes for everything.


valentines day brunch menu
this brunch was so so so so good, and so so easy and made us happy and appreciative of one another and all the good things we have to be grateful for.
it really was simple; i put the whole thing together while hubs ran saturday morning errands. come back soon for all the recipes!


Friday, February 17, 2012

{this moment}

a friday ritual.
a single photo – no words – capturing a moment from the week.
a moment i'd like to pause, to revisit and remember.


{this moment} inspired by SouleMama
if you are inspired, too, leave a link to your 'moment' in the comments for all to see, and head over to SouleMama's blog to do the same. I have discovered so many great blogs this way! xoxo